Install Splunk UF on Windows automatically with batch script
Install Splunk UF on Windows automatically with batch script
Splunk Universal Forwarders can be installed on Windows in a number of ways, including through software distribution mechanisms common in the Windows world, such as SCCM. However, in some situations, e.g. during a PoC, it is not possible or appropriate to include the installation of the UF directly in the regular software distribution. In such a case, automated installation of UF on Windows using batch scripts can be a welcome solution that leads to success in just a few steps.
The script described here does the installation with the following aspects:
- General installation of the Splunk Universal Forwarder
- Create an admin account in the Splunk UF with a predefined password, which is provided in anonymized form via the
user-seed.conf - Insertion of a common
splunk.secret - Connection to a deployment server
- NO connection to Indexer, this will follow later via the Deployment Server
The following script is a simple solution on which more complex cases may be built. For example, this version does not include checks to see if the selected installation package matches the current operating system.
Prerequisites:
- Administrator rights on the Windows instance
- The batch script and the installation file are located on an available disk space, either locally on the Windows instance or on a network drive, etc.
- The splunk.secret, which is shared across the entire Splunk infrastructure
- The anonymized password for the user
admin, which we can create on any Splunk instance using the commandsplunk hash-passwd MeinGeheimesPasswort. This command uses a hash function to convert the entered password into a representation like$6$8dZNO1R....
Let’s take a look at the individual parts of the script splunk-uf-install.bat :
First we set the variables we want to use later:
- INST_PACK: The installation file we want to use on the given Windows instance.
- INST_DIR: The directory where the Splunk UF is to be installed.
- SPLUNK_SECRET: The shared
splunk.secretof the Splunk infrastructure. - USER_SEED: The anonymized password for the user
admin. - DEPLOY_SERVER: Deployment server from which Splunk UF should subsequently obtain the further configurations.
In the next step we start the actual installation:
- /I%INST_PACK%”: Selects the installation file to use.
- /L*V splunkforwarder.install.log: Creates a log file about the installation process in verbose mode.
- ALLUSERS=1: Performs the installation for the machine and not for the user.
- /passive: Passive installation with a dialog and progress indicator, but without the possibility to cancel the installation.
- INSTALLDIR=%INST_DIR%”: Sets the installation directory to use.
- SERVICESTARTTYPE=AUTO: Activates the autostart of the Splunk UF when the operating system is started.
- AGREETOLICENSE=Yes: Accepts the license.
- LAUNCHSPLUNK=0: Prevents the Splunk UF from starting. So it is only installed, but not (yet) started.
- DEPLOYMENT_SERVER=%DEPLOY_SERVER%”: Sets the deployment server to use.
During the installation, even before the Splunk UF is started for the first time, the installation routine first creates a random string in the file $SPLUNK_HOME\etc\auth\splunk.secret. This file is used as salt when encrypting passwords in the configuration and is also necessary to decrypt the encrypted passwords. So it has proven to be good practice to use the same splunk.secret on all Splunk instances of an installation, because then the passwords once centrally encrypted can be used in all configuration files in already encrypted form. In the present application example, it is important to enforce a common splunk.secret because we want to obtain the outputs.conf for the indexers via the deployment server in the further course, which contains the encrypted password for the “Indexer Discovery” option.
After creating the splunk.secret the installation routine uses it to encrypt the SSL password which is used for the internal communication of the Splunk instances (mostly via port 8089). If we simply set a new splunk.secret, the Splunk UF would not be able to decrypt the previously encrypted password. Therefore, we delete the existing SSL password at the same time, which is then re-encrypted with the then new set splunk.secret when Splunk UF is started.
In the call for the installation routine, we deliberately did not specify a user and password, because then the password would be contained in plain text in the batch script. Instead, we use the option with the user-seed.conf, in which we can insert a previously encrypted password. We create this file user-seed.conf with the script and fill in the encrypted password from the variable %USER_SEED%:
Finally, we start the Splunk instance and finish the installation:
The complete script will look like this:
We now have two options for executing the script. Provided that we have specified the absolute path to the installation package in the variable %INST_PACK%, we can start the script with a right mouse click on the file and start the execution as administrator:

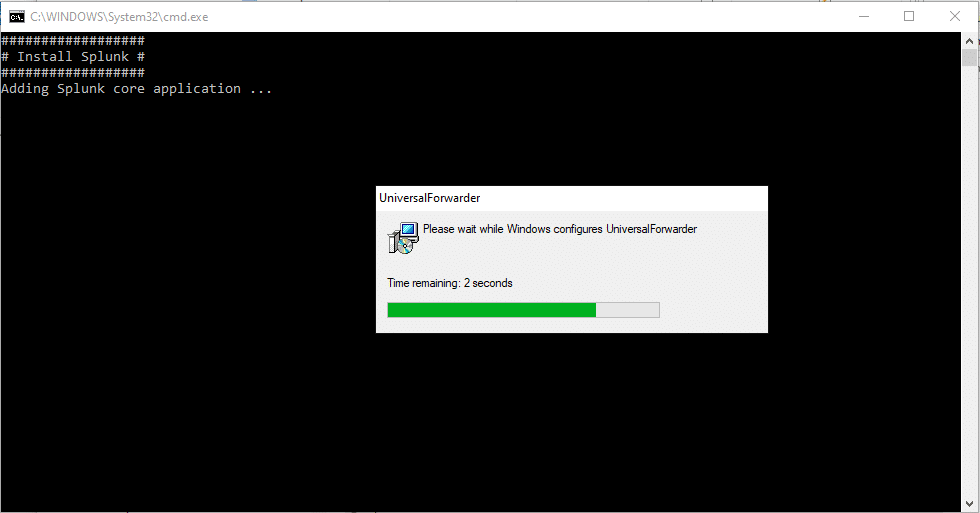
This starts the execution of the script:
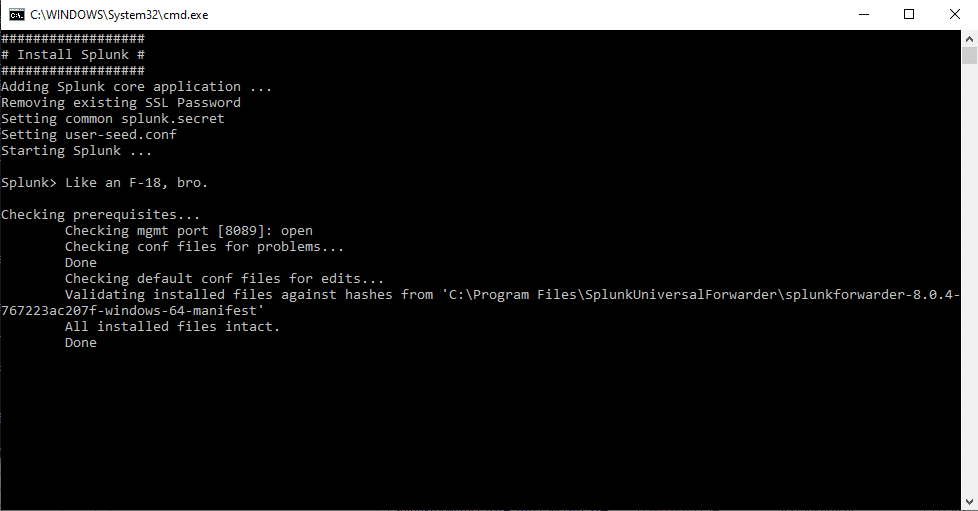
After the script is finished, the window closes automatically:
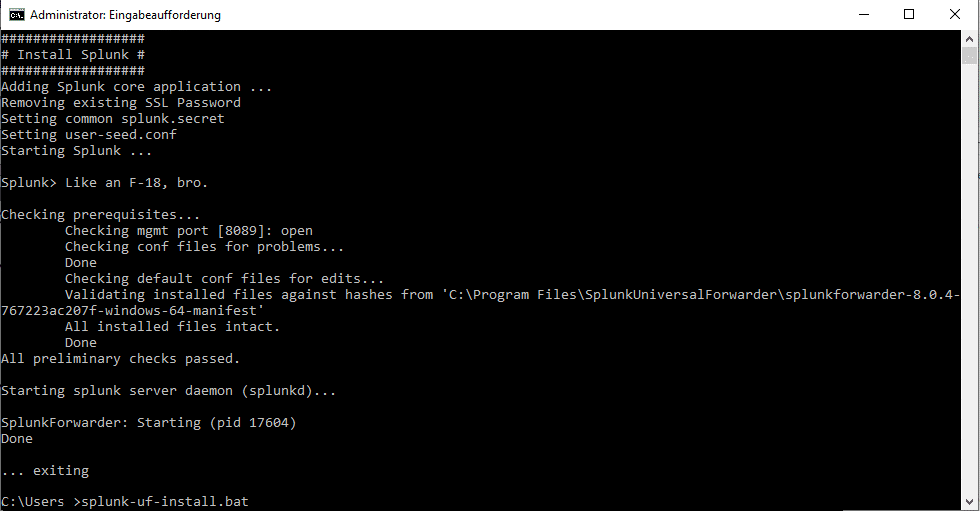
If we cannot specify the absolute path to the installation package in the variable %INST_PACK%, we open a command line as administrator and navigate to the directory where the script and installation package are located, then we start the script by calling splunk-uf-install.bat. Again, the installation runs through without user interaction, after the end the command line remains open and does not close automatically:
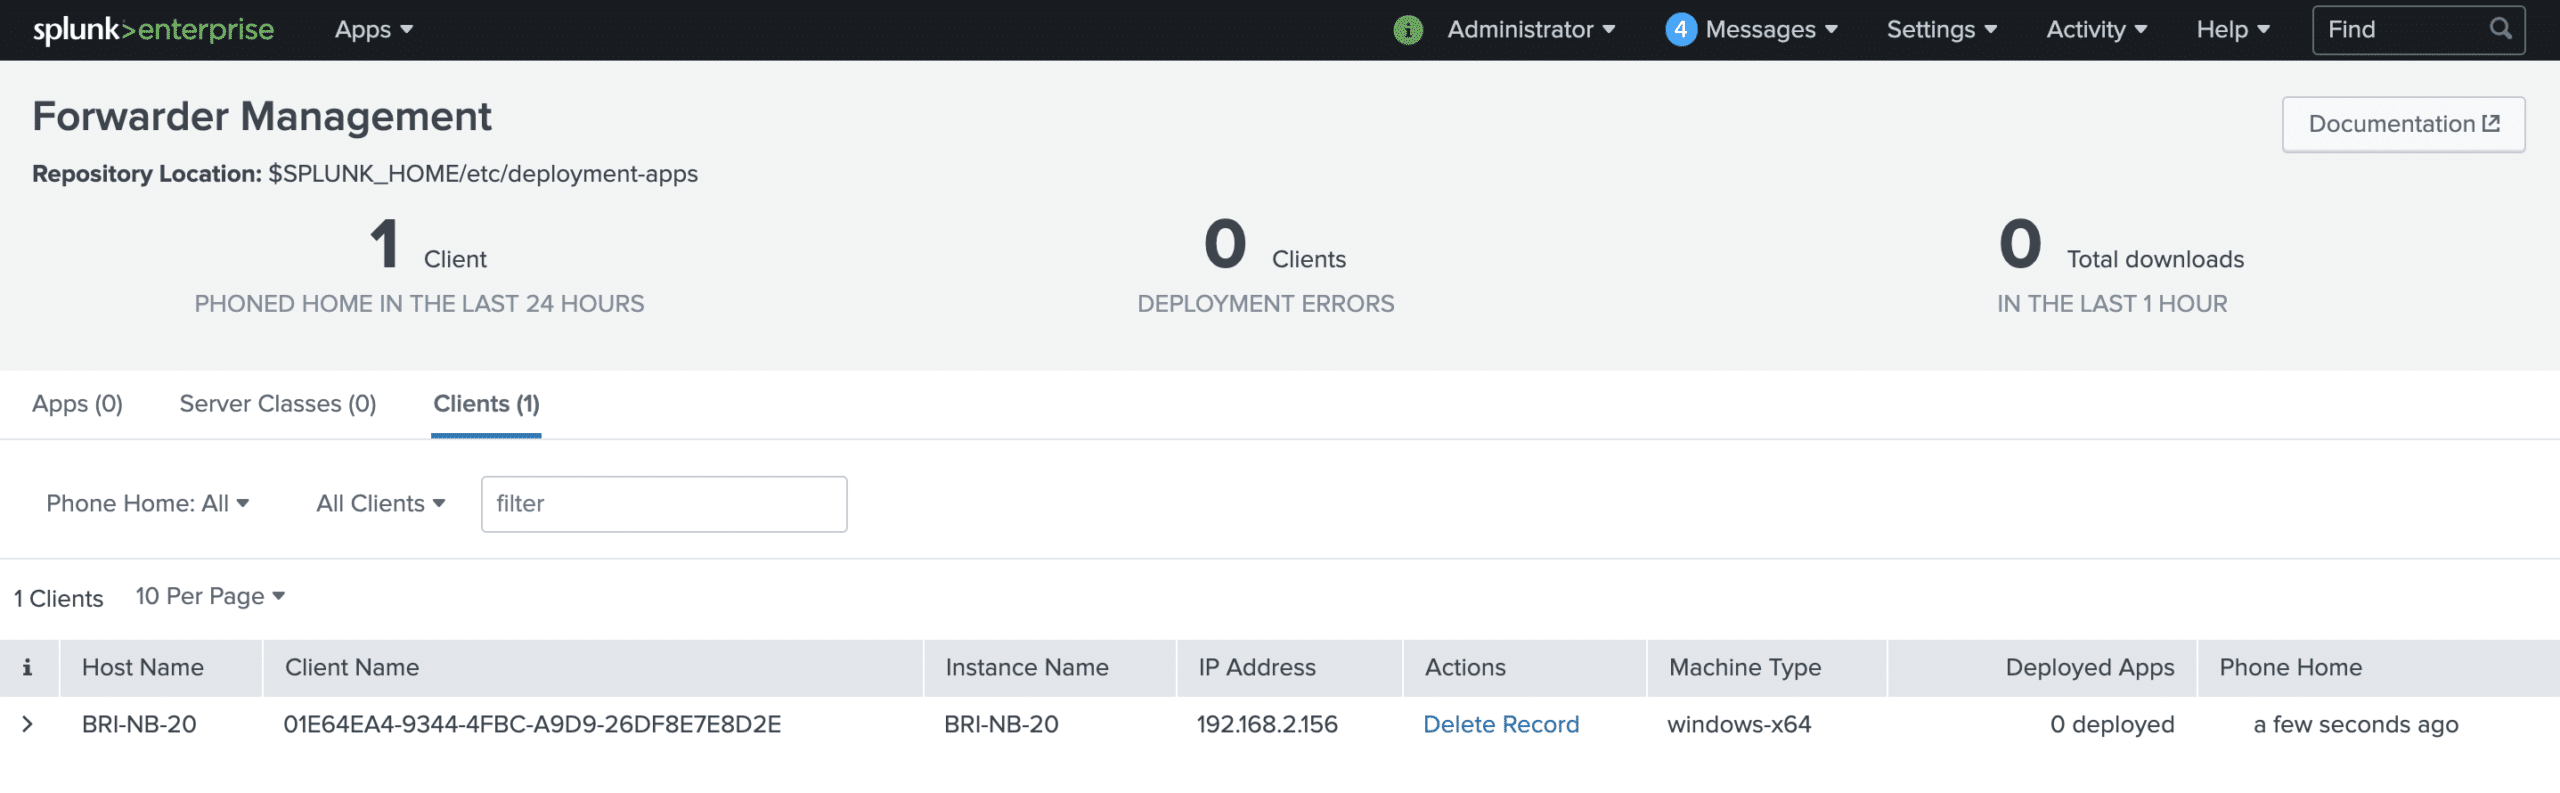
In both cases, after a short time, the new Splunk Universal Forwarder reports to the Deployment Server, from where we can assign the further configurations for input and output:
So with this approach, we can install Splunk Universal Forwarder on any number of Windows instances very quickly and connect it to the Deployment Server. Especially when there is no central software distribution, this helps us enormously in rolling out the Splunk infrastructure.
By the way, we also offer jobs. Learn more here.